

Opensource.com
In a nutshell, an Arduino is an open hardware development board that can be used by tinkerers, hobbyists, and makers to design and build devices that interact with the real world. While Arduino refers to a specific type of board design, it can also be used to refer to a company which manufactures a specific implementation of these boards, and is typically also used to describe the community around compatible boards made by other people or companies which function in a similar way.
For more on the basics, watch this quick video below.
What makes up an Arduino?
Arduinos contain a number of different parts and interfaces together on a single circuit board. The design has changed through the years, and some variations include other parts as well. But on a basic board, you’re likely to find the following pieces:
- A number of pins, which are used to connect with various components you might want to use with the Arduino. These pins come in two varieties:
- Digital pins, which can read and write a single state, on or off. Most Arduinos have 14 digital I/O pins.
- Analog pins, which can read a range of values, and are useful for more fine-grained control. Most Arduinos have six of these analog pins.
These pins are arranged in a specific pattern, so that if you buy an add-on board designed to fit into them, typically called a “shield,” it should fit into most Arduino-compatible devices easily.
- A power connector, which provides power to both the device itself, and provides a low voltage which can power connected components like LEDs and various sensors, provided their power needs are reasonably low. The power connector can connect to either an AC adapter or a small battery.
- A microcontroller, the primary chip, which allows you to program the Arduino in order for it to be able to execute commands and make decisions based on various input. The exact chip varies depending on what type of Arduino you buy, but they are generally Atmel controllers, usually a ATmega8, ATmega168, ATmega328, ATmega1280, or ATmega2560. The differences between these chips are subtle, but the biggest difference a beginner will notice is the different amounts of onboard memory.
- A serial connector, which on most newer boards is implemented through a standard USB port. This connector allows you to communicate to the board from your computer, as well as load new programs onto the device. Often times Arduinos can also be powered through the USB port, removing the need for a separate power connection.
- A variety of other small components, like an oscillator and/or a voltage regulator, which provide important capabilities to the board, although you typically don’t interact with these directly; just know that they are there.
How do I program an Arduino?
Most Arduino enthusiasts, especially when they are starting out, will choose to use the official integrated development environment (IDE) for the Arduino. The Arduino IDE is open source software which is written in Java and will work on a variety of platforms: Windows, Mac, and Linux. The IDE enables you to write code in a special environment with syntax highlighting and other features which will make coding easier, and then easily load your code onto the device with a simple click of a button.
The code for Arduino is generally written in Wiring, which is based on the Processing programming language. For more on getting started with Arduino programming, visit the official documentation.
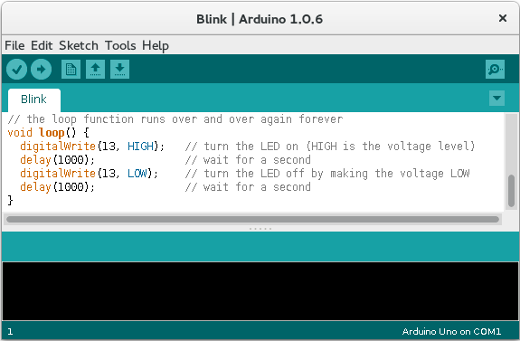
A screenshot of the Arduino integrated development environment.
Where can I learn more?
Here at Opensource, we have written articles on a number of projects and tools which make use of the Raspberry Pi for learning, conducting research, and just for fun. These are a few of our favorites:
- Can't decide between an Arduino and a Raspberry Pi? Ruth Suehle walks you through some of the differences and what might help you make an informed decision.
- Want to control a high power device with your Arduino? Bob Monroe takes a look at a DC motor control shield.
- Ever thought about using the Arduino to read from other devices nearby? Luis Ibanez takes you through the basics of using RFID tags with the Arduino.
- Getting started? Here's a look at an Arduino starter pack.
- Looking for some new project ideas? Alex Sanchez rounds up six favorites for Arduino Day.
- Wondering how it all got started? Check out the making of Arduino to learn a little about the little device's history.
- Be sure to check out the Arduino tag here at Opensource.com for even more articles.
 This work is licensed under a Creative Commons Attribution-Share Alike 4.0 International License.